Deployment on a VPS
Deploying to your own VPS with Coolify gives you more control and avoids the cold start limitations of free PaaS tiers. However, this document won't go too deep about how to set up a VPS + domain + Coolify instance itself.
For that, I recommend you check:
- My personal blog series on VPS setup, where I tackle that challenge step-by-step
- Dreams of Code: "Setting up a production ready VPS is a lot easier than I thought"
Once you have your Coolify instance up and running, let's deploy your Spring Boot application.
Why a VPS?
There are plenty of ways to host a web application in 2026. Managed Kubernetes clusters, serverless functions, PaaS providers with generous free tiers, you name it. Here's a rough map of your hosting options:
For this project, we're going with a VPS in the "Developer Cloud" quadrant. The reason is simple: it's the easiest to explain, and the easiest to reason about. You get a Linux box, you SSH into it, you run your containers. There's no abstraction layer hiding what's happening.
That simplicity comes with tradeoffs. By choosing a single VPS, you're giving up things that real-world production systems often need:
- Load balancing across multiple instances
- Rolling deployments with zero downtime
- Auto-scaling when traffic spikes
- Multi-region redundancy for global availability
- Managed databases with automatic backups and failover
You don't need any of that right now. You're learning how deployment works, not architecting for millions of users. A single VPS with Docker Compose is more than enough, and when the time comes to scale, you'll understand the fundamentals well enough to know what you're scaling away from.
Architecture overview
Here's exactly what happens when you push code to the main branch:
The important thing is that Coolify only deploys if GitHub Actions passes. This prevents broken code from reaching production. GitHub Actions handles the heavy lifting of compiling and testing across all three language implementations, while Coolify focuses purely on the deployment orchestration.
Alternative: Docker registry approach
The architecture above has Coolify building Docker images on the VPS itself. There's another common pattern where GitHub Actions builds the images, pushes them to a container registry (like GitHub Container Registry, Docker Hub, or AWS ECR), and Coolify just pulls the pre-built images:
Both approaches are valid. Here's how they compare:
| Coolify Builds (This Guide) | Registry-Based | |
|---|---|---|
| VPS resource usage | Higher: compiling happens on your server | Lower: your VPS only pulls and runs images |
| CI minutes | Lower: CI only runs tests | Higher: CI also builds and pushes Docker images |
| Pipeline complexity | Simpler: fewer moving parts, no registry credentials to manage | More setup: registry auth, image tagging strategy, cleanup policies |
| Build consistency | Builds happen on VPS hardware, which may differ from CI | Images are identical everywhere, built once in a controlled environment |
| Deployment speed | Slower: Coolify compiles from source each time | Faster: Coolify just pulls a ready-to-run image |
| Rollbacks | Requires a rebuild from a previous commit | Pull a previous image tag, nearly instant |
| Debugging builds | Harder: build logs are in Coolify, separate from CI | Easier: everything is in one place (GitHub Actions) |
If your VPS is resource-constrained (1-2 GB RAM), building Java applications with Gradle on it can be painful. Moving the build to GitHub Actions (which has 7 GB RAM on free runners) and pushing pre-built images to a registry is a practical solution.
This guide uses the "Coolify builds" approach because it's simpler to set up and doesn't require managing registry credentials or image retention policies. For a small project or learning setup, the reduced complexity is worth the tradeoff.
Repository setup
This guide demonstrates deploying a monorepo containing three Spring Boot projects (Java, Kotlin, and Groovy implementations of the same API). While the setup is more complex than a single-project repo, the core concepts remain the same.
Before configuring Coolify, you need to prepare your repository with Docker and CI/CD configurations. Here's a summary of the new and modified files:
docker-compose.yml
This file orchestrates all three Spring Boot services:
Each service:
- Builds from its own Dockerfile located in the respective module directory
- Maps port 8080 to the internal Spring Boot port (8080), and the external port matches because Coolify handles routing
- Activates the
prodprofile for production-optimized settings - Includes a healthcheck using Spring Boot Actuator to ensure the container is actually ready
- Restarts automatically if the container crashes
Dockerfiles
Each module gets its own optimized Dockerfile:
- Java
- Kotlin
- Groovy
A few important details about this multi-stage build:
- Stage 1 (Build): Uses the full Gradle image with JDK 21 to compile the application. We skip tests and Spotless formatting because those already ran in GitHub Actions.
settings-docker.gradletrick: Each module has a minimal settings file that only includes itself. This prevents Docker from trying to build the entire monorepo when we just want one service.- Stage 2 (Runtime): Uses a slim JRE-only Alpine image for a smaller attack surface and faster deployments.
curlinstallation: Required for the healthcheck to work.
settings-docker.gradle
Each module needs a standalone settings file for Docker builds:
- Java
- Kotlin
- Groovy
rootProject.name = 'springboot-demo-projects'

include 'spring_java'
rootProject.name = 'springboot-demo-projects'

include 'spring_kotlin'
rootProject.name = 'springboot-demo-projects'

include 'spring_groovy'
This minimal configuration tells Gradle to only build the specific module, avoiding unnecessary compilation of the entire monorepo during the Docker build phase.
Gradle wrapper exception in .gitignore
gradle/wrapper/gradle-wrapper.jar is currently needed for Docker Compose deployment because:
- Current Docker configuration: Each Dockerfile uses
gradlewto build the JARs during the Docker build process. - Multi-stage builds: The build stage depends on Gradle to compile and package the applications.
- Settings customization: Dockerfiles use custom Gradle settings files.
Exclude it from being ignored:
!gradle/wrapper/gradle-wrapper.jar
.github/workflows/ci-cd.yml
The GitHub Actions workflow orchestrates the CI/CD pipeline:
This workflow has two jobs:
build-and-test: Runs on every push and pull request. It compiles all three modules, runs tests, and uploads test reports as artifacts.deploy: Only runs on pushes tomainafterbuild-and-testsucceeds. It triggers Coolify's deployment webhook.
The workflow uses two secrets (COOLIFY_DEPLOY_UUID and COOLIFY_API_TOKEN) that you'll configure later in GitHub.
Coolify + GitHub Actions setup
Now that your repository is ready, let's configure Coolify to work with GitHub Actions.
Step 1: Create the Coolify resource
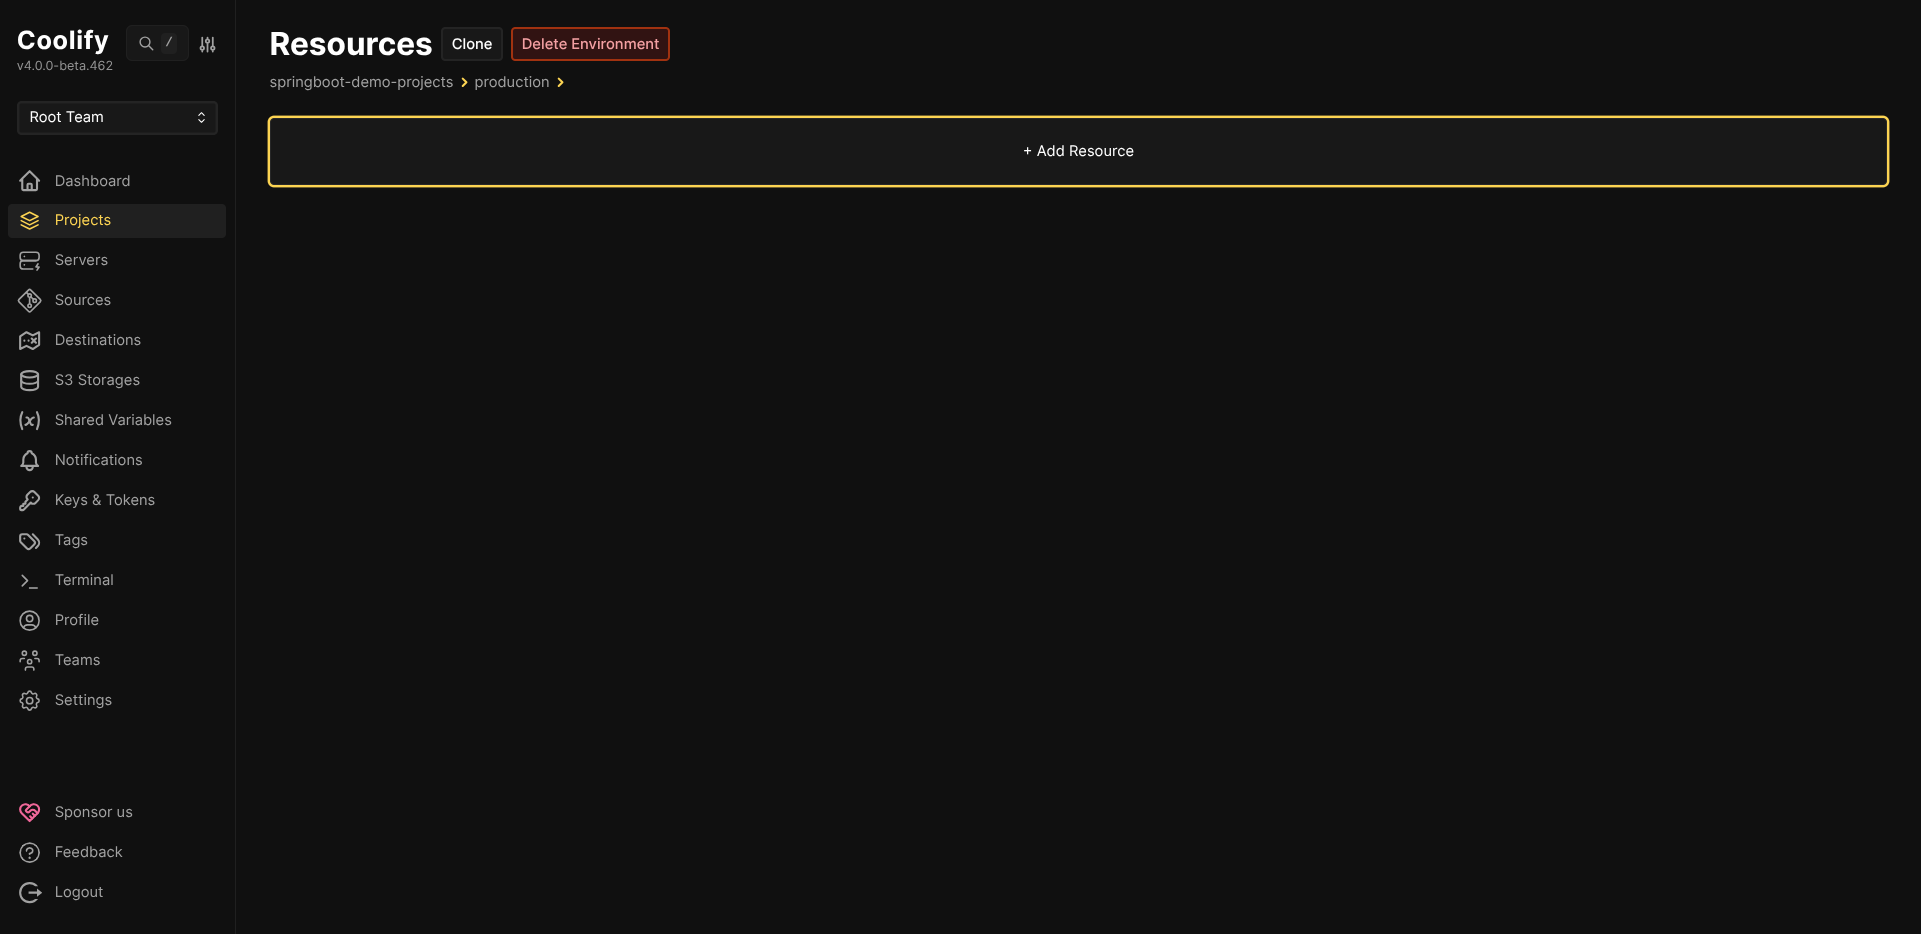
-
Go to your project in Coolify and click + Add Resource.
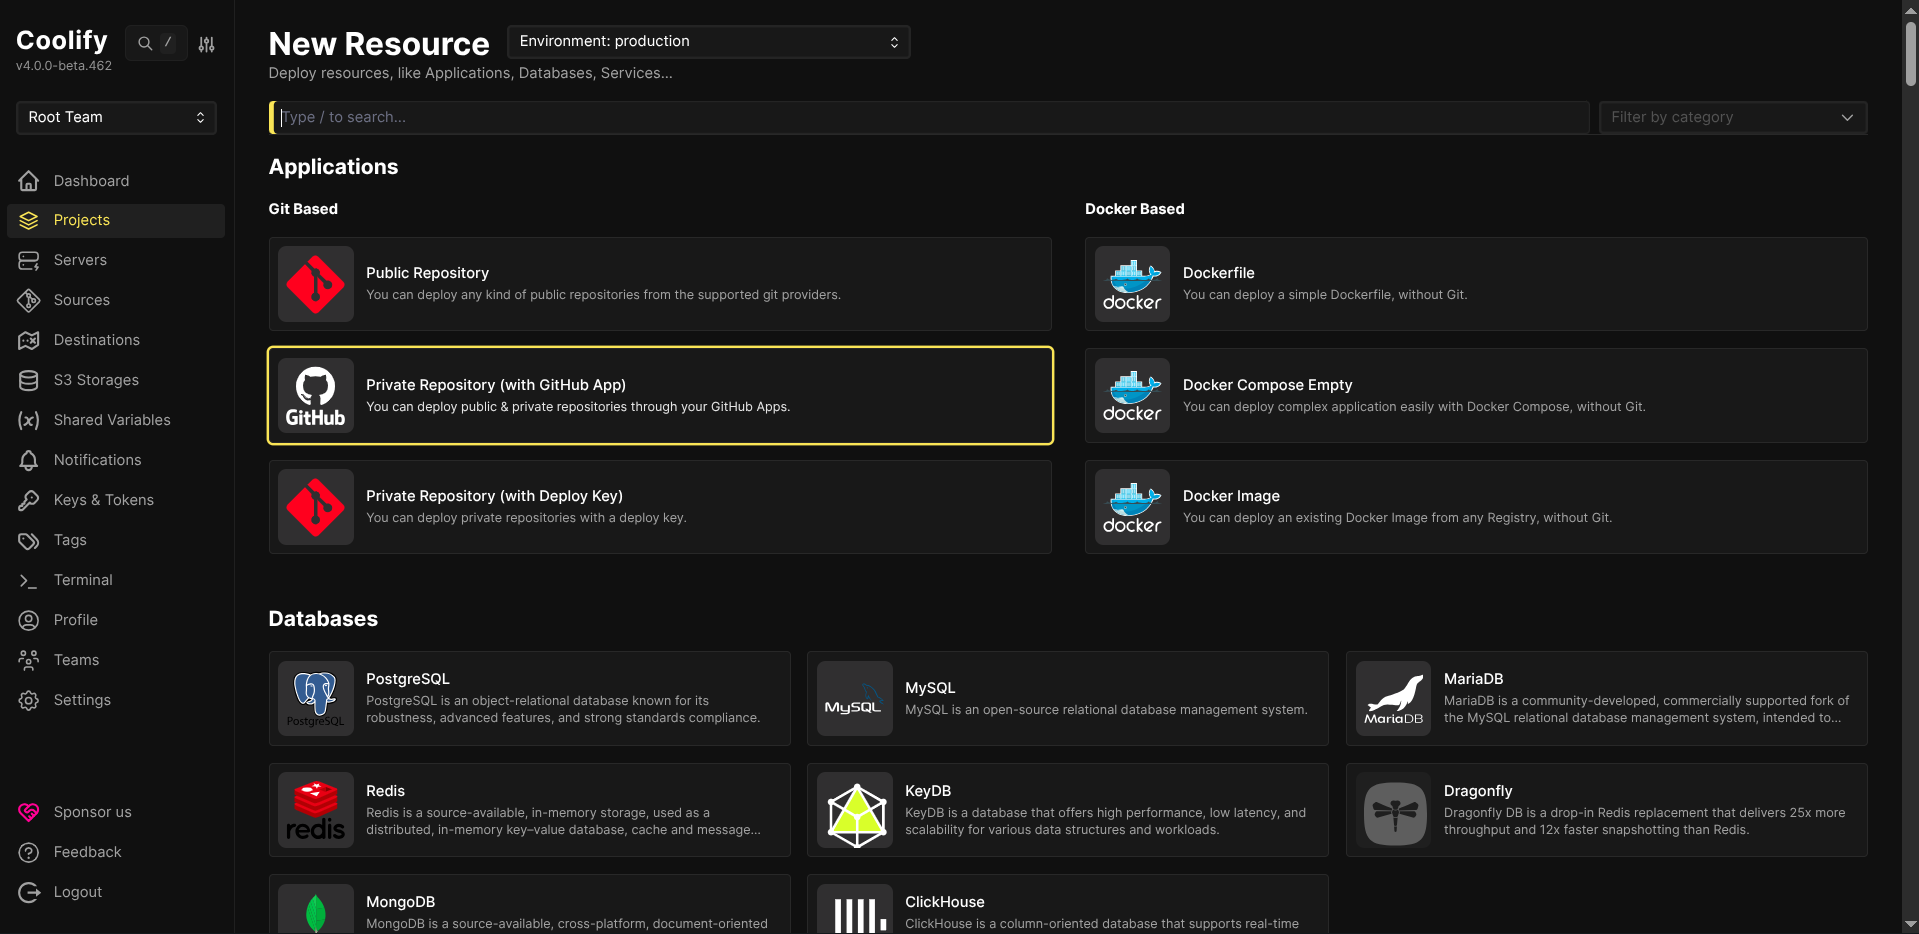
-
Under Git Based, select Private Repository (with GitHub App).
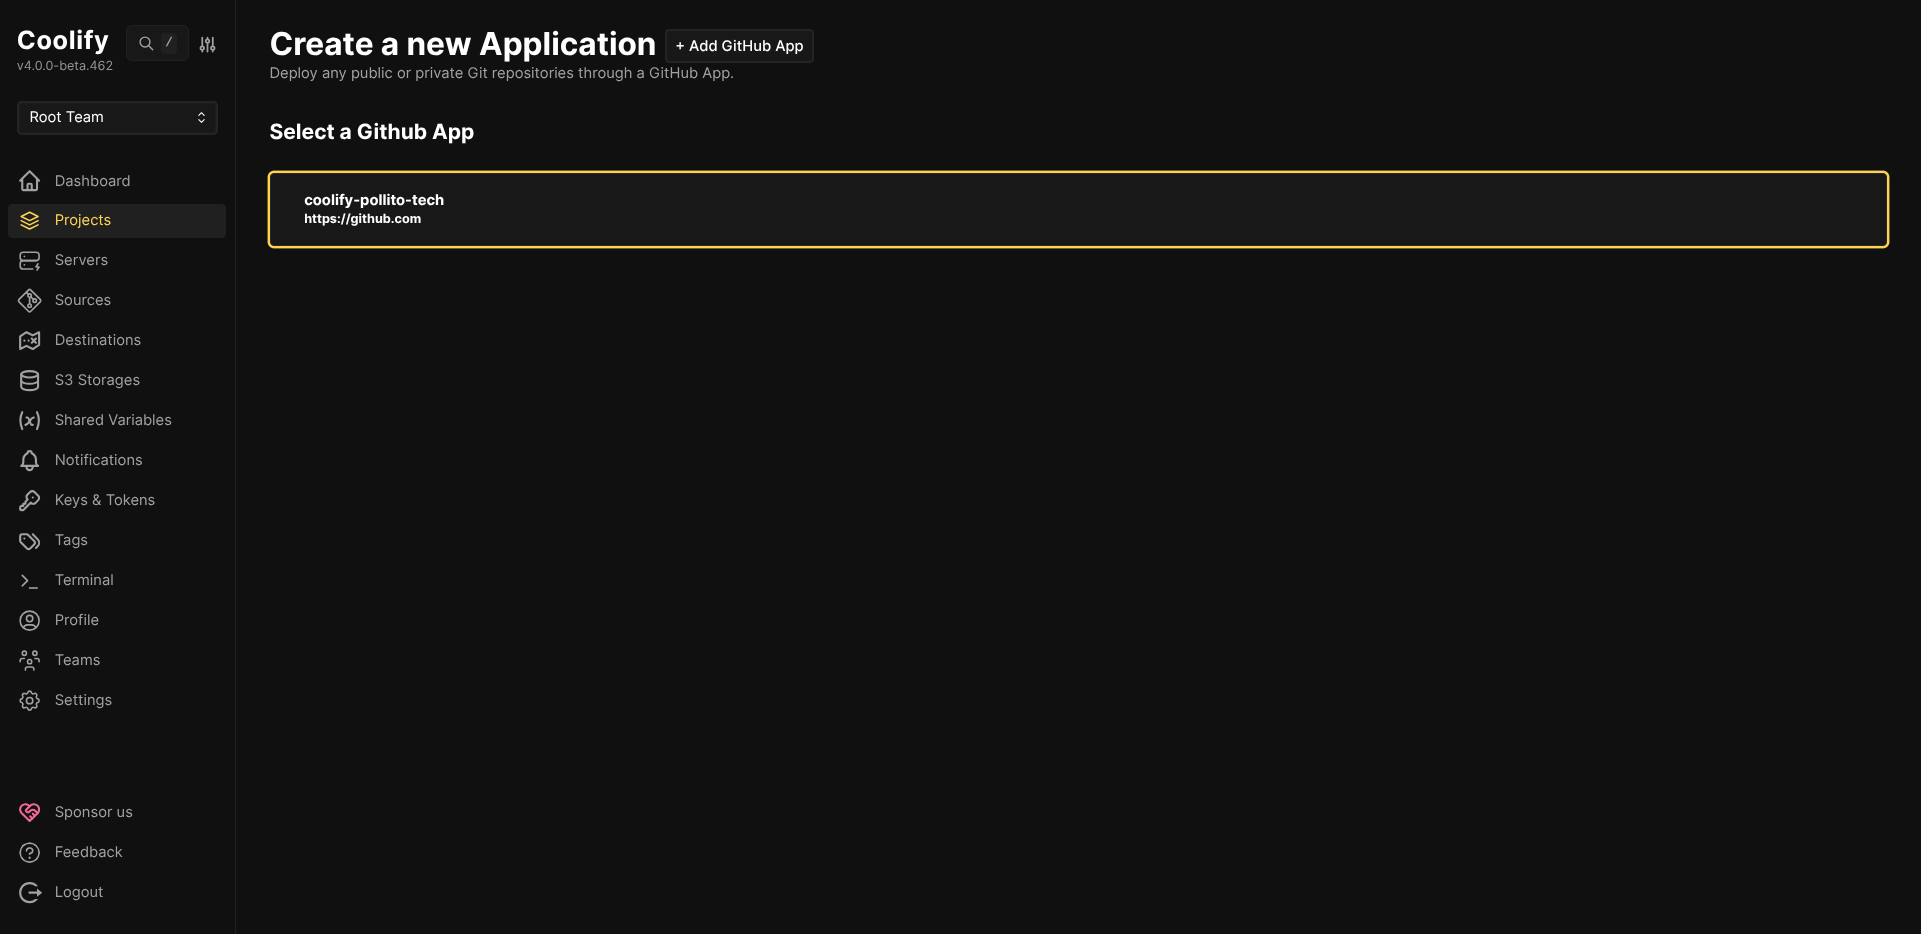
-
Select your connected GitHub App.
-
Configure the application:
- Repository: Select your repository (e.g.,
springboot-demo-projects) - Branch:
main - Build Pack: Docker Compose
- Base Directory:
/ - Docker Compose Location:
/docker-compose.yml
File Extension MattersMake sure the Docker Compose location matches your actual file extension. It's easy to mix up
.ymland.yaml, so Coolify will fail to find the file if they don't match exactly.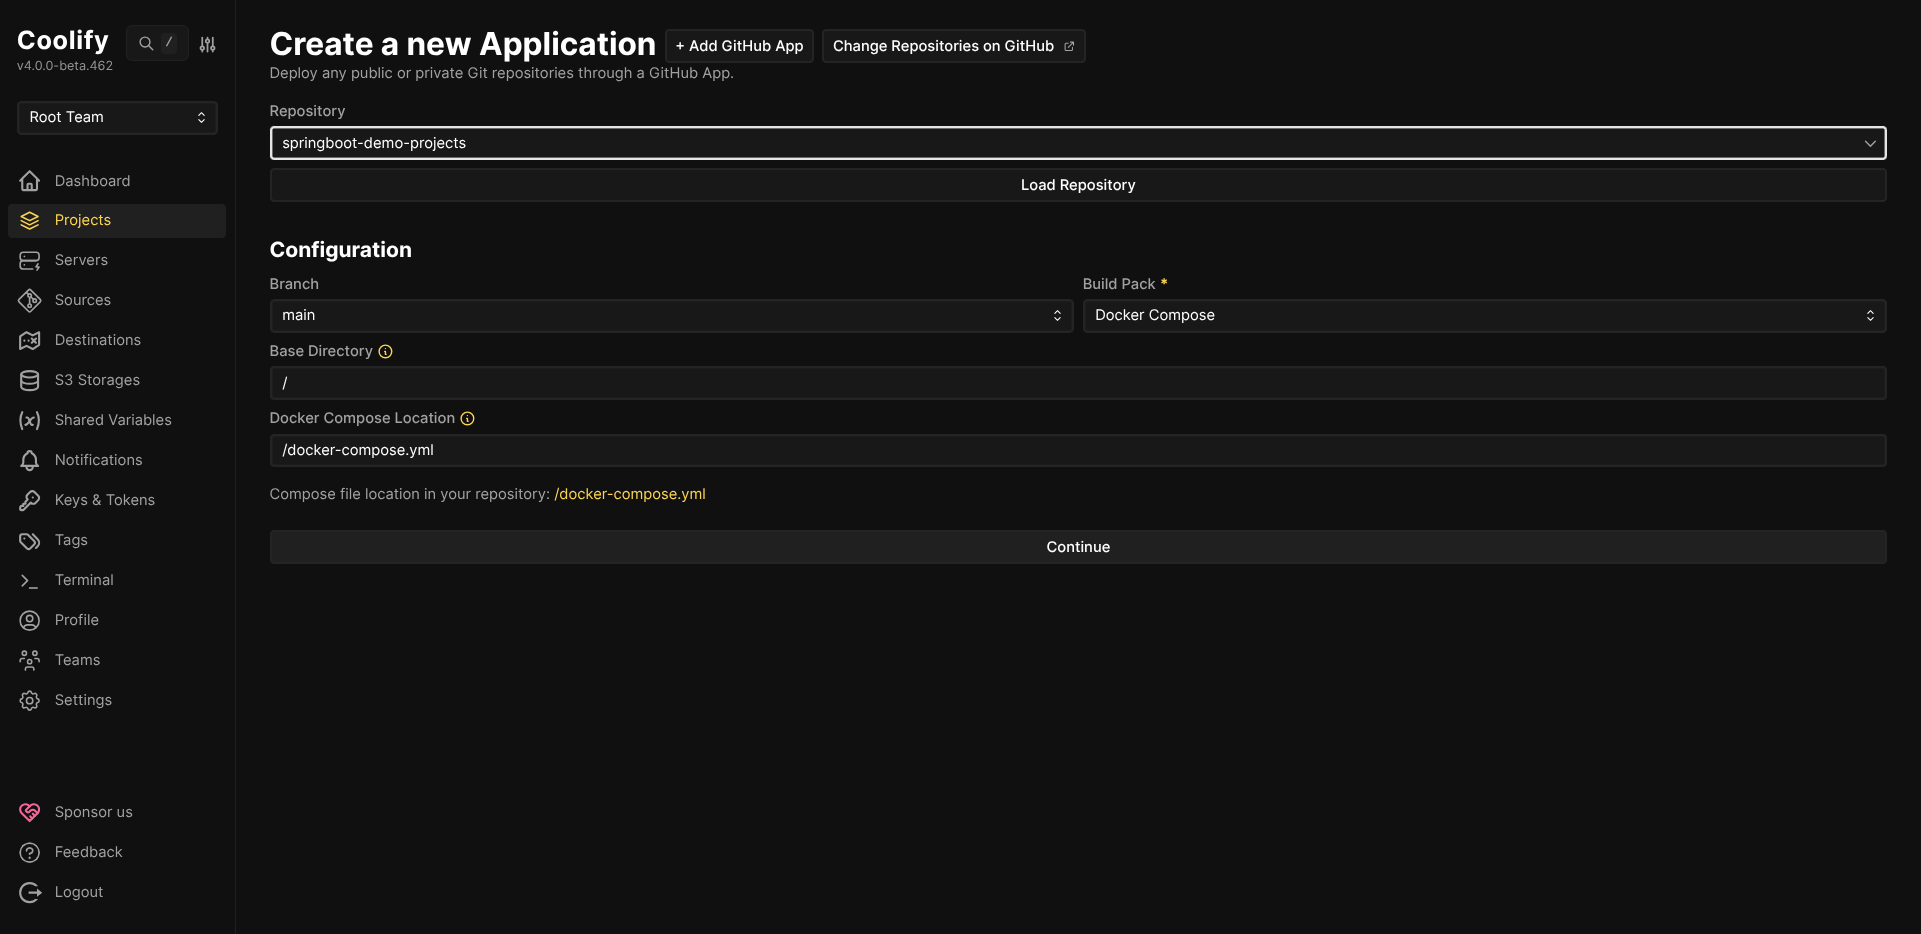
- Repository: Select your repository (e.g.,
Step 2: Configure General Settings
Once created, go to the Configuration tab and set up your services:
-
Domains: Add your custom domains:
https://sakila-java.your-domain.com:8080https://sakila-kotlin.your-domain.com:8080https://sakila-groovy.your-domain.com:8080
Port ConfigurationImportant: Each service is configured to expose port 8080. Coolify's reverse proxy will handle routing traffic to each container based on the domain name. If you run into routing issues, check Coolify's documentation for more details.
-
Docker Compose Editor: Verify your
docker-compose.ymlcontent is displayed correctly.
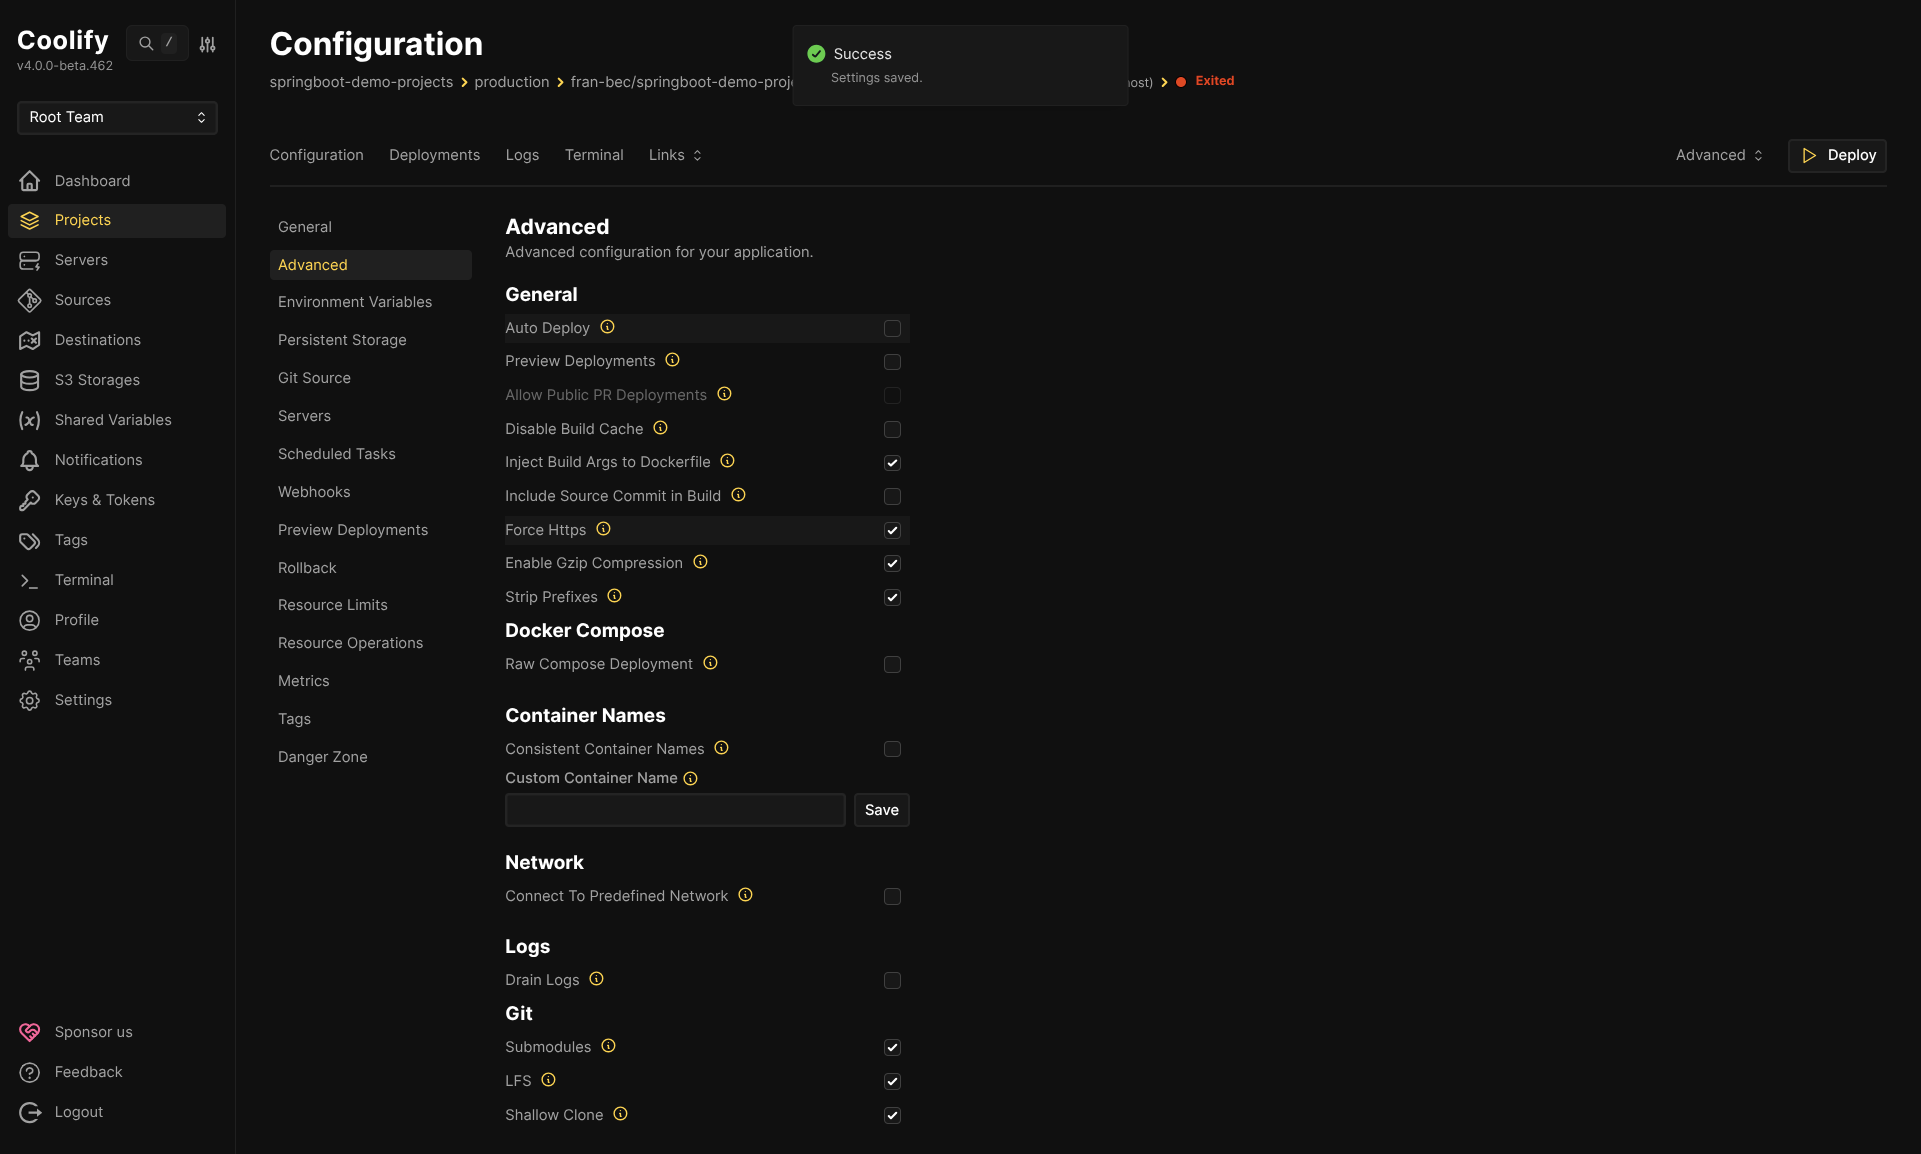
Step 3: Disable Auto Deploy
Navigate to the Advanced tab and uncheck Auto Deploy.
Critical: You must disable Auto Deploy. If left enabled, Coolify will deploy on every git push, bypassing your GitHub Actions CI pipeline. This defeats the purpose of having tests gate your deployments.
Step 4: Get the deploy webhook URL
Navigate to the Webhooks tab to find your deployment trigger URL:
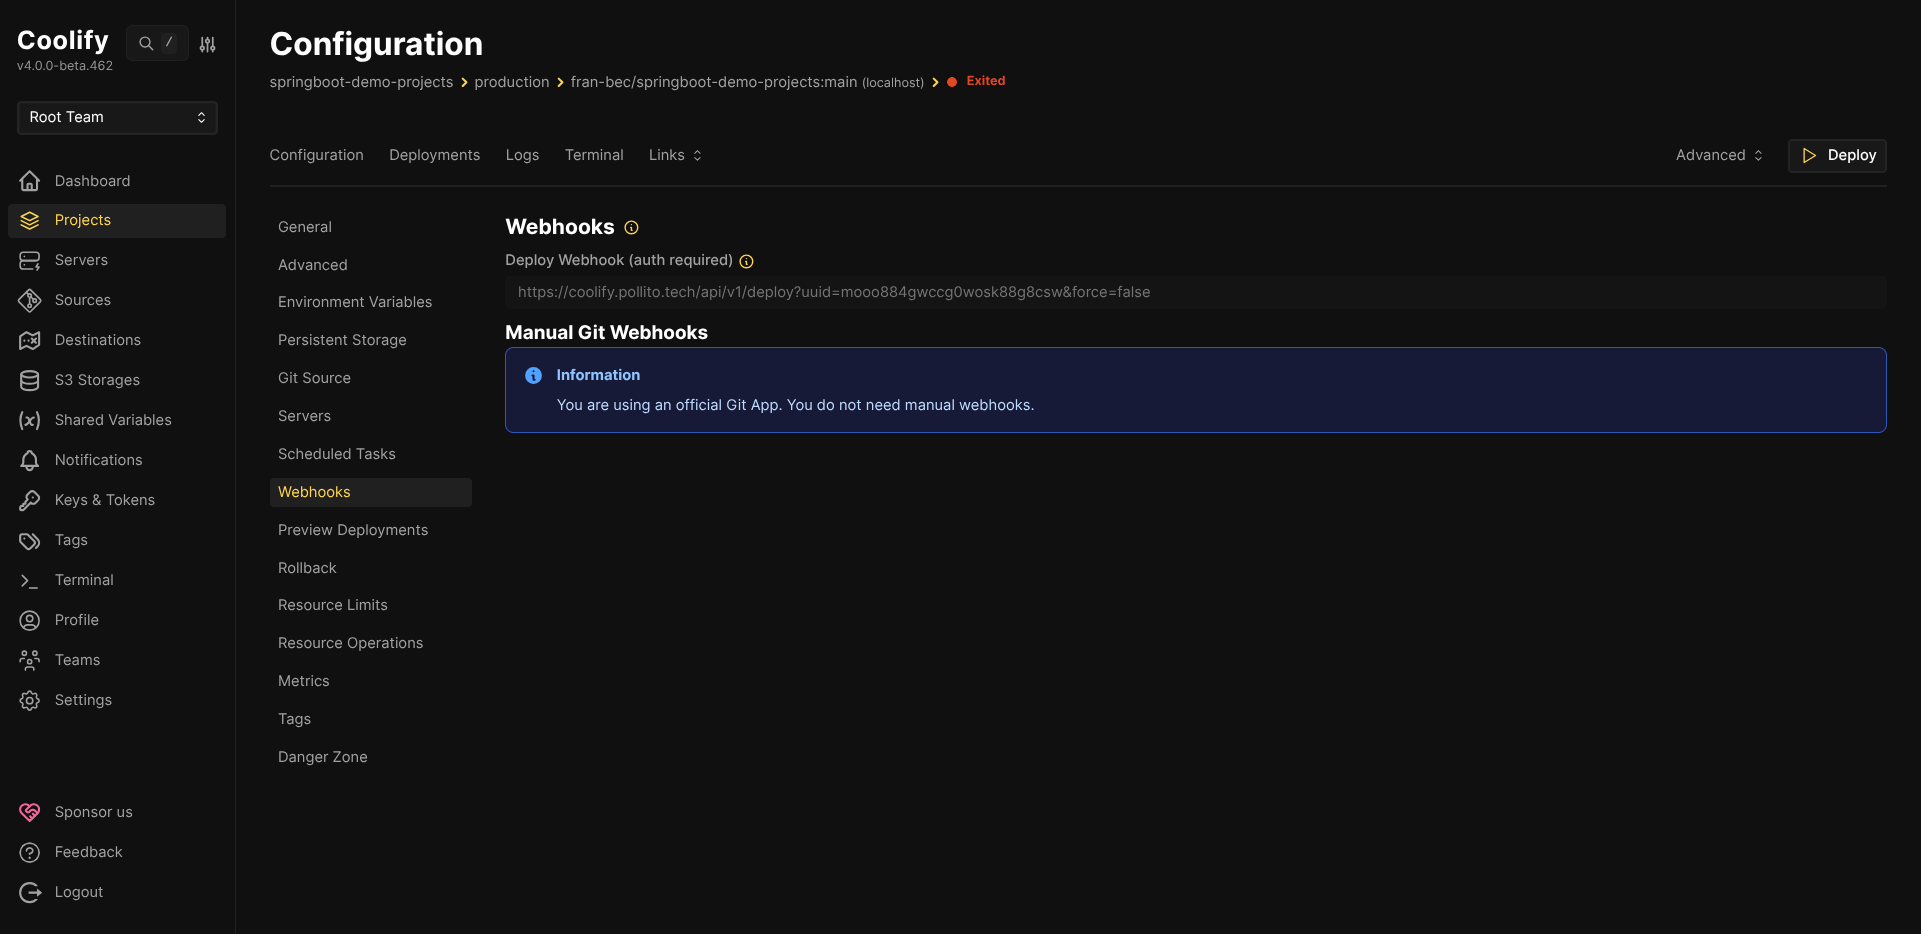
Copy the Deploy Webhook URL. It looks like:
https://coolify.your-domain.com/api/v1/deploy?uuid=YOUR_UUID&force=false
The uuid query parameter is the unique identifier for your Coolify resource. You will store this in GitHub as the COOLIFY_DEPLOY_UUID secret.
Step 5: Generate an API token
-
Go to Keys & Tokens → API Tokens in the left sidebar.
-
If API is disabled, enable it in Settings first.
-
Create a new token:
- Description:
github-actions - Permissions: Only check
deploy
Minimal PermissionsOnly grant the
deploypermission. The GitHub Actions workflow only needs to trigger deployments, not read sensitive data or modify resources.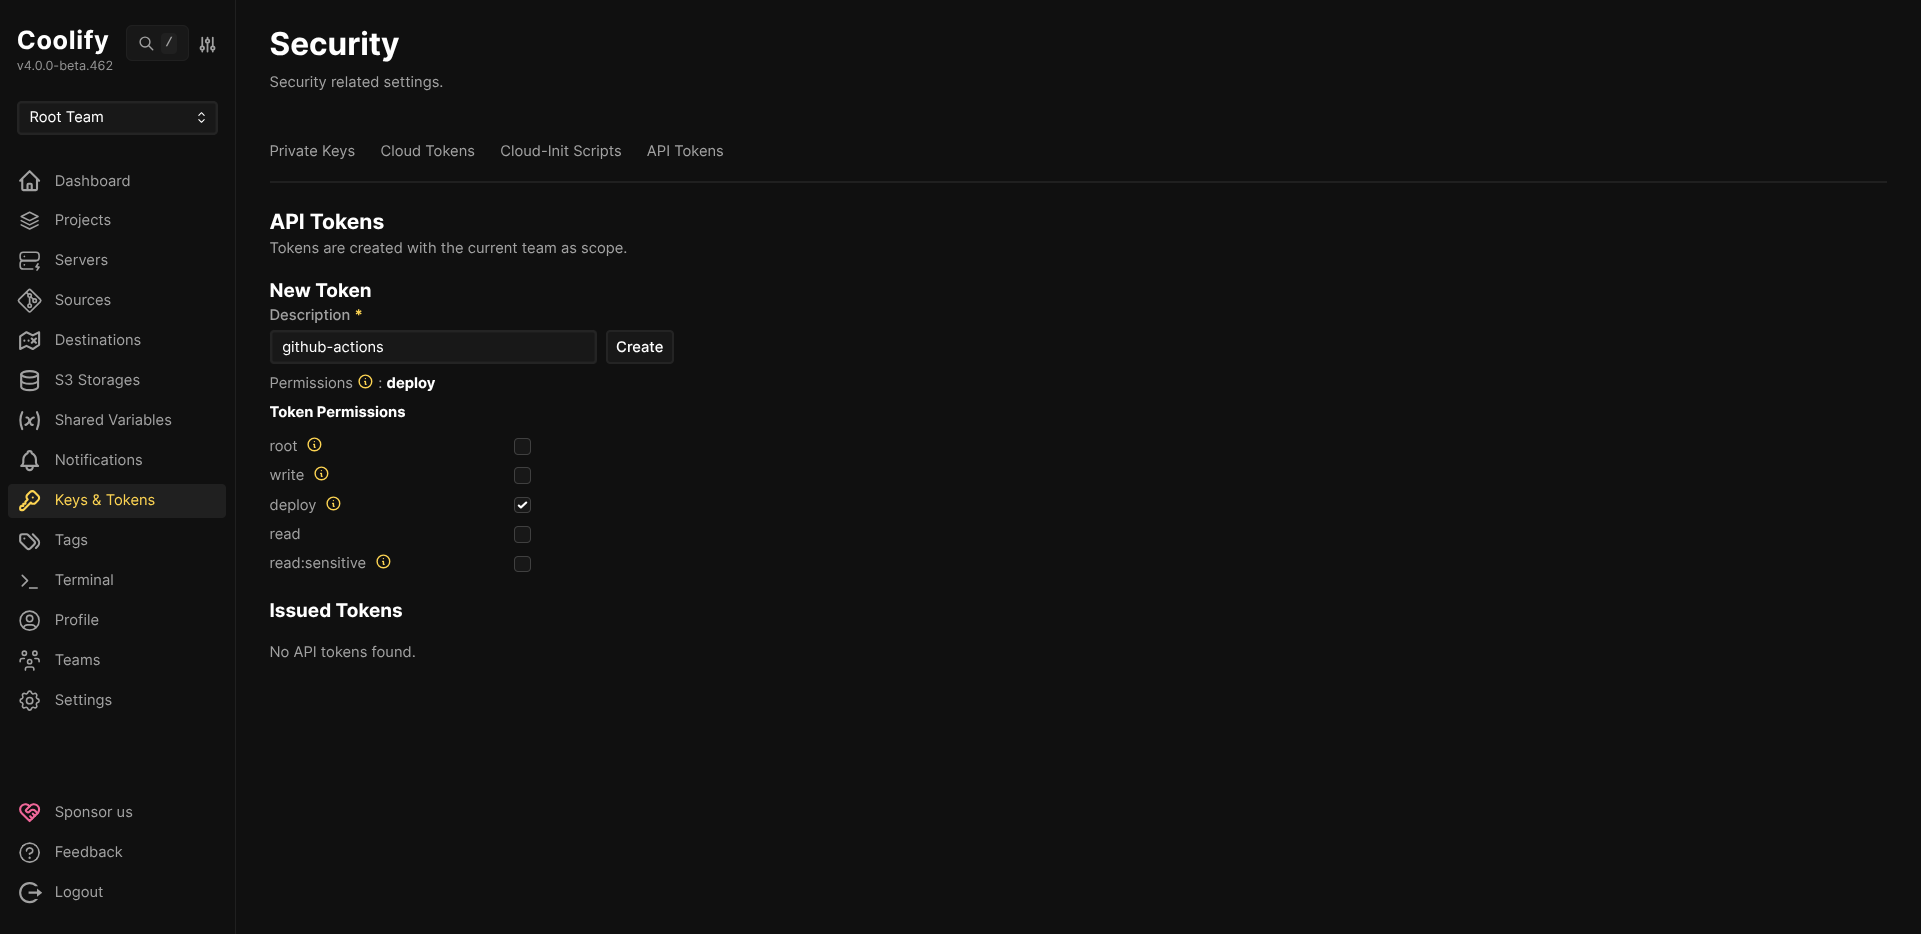
- Description:
-
Copy the generated token. You will store this in GitHub as the
COOLIFY_API_TOKENsecret.
Step 6: Configure GitHub secrets
Go to your GitHub repository → Settings → Secrets and variables → Actions, and add these repository secrets:
-
COOLIFY_API_TOKEN: The API token you just generated -
COOLIFY_DEPLOY_UUID: The UUID from the webhook URL (theuuidquery parameter value)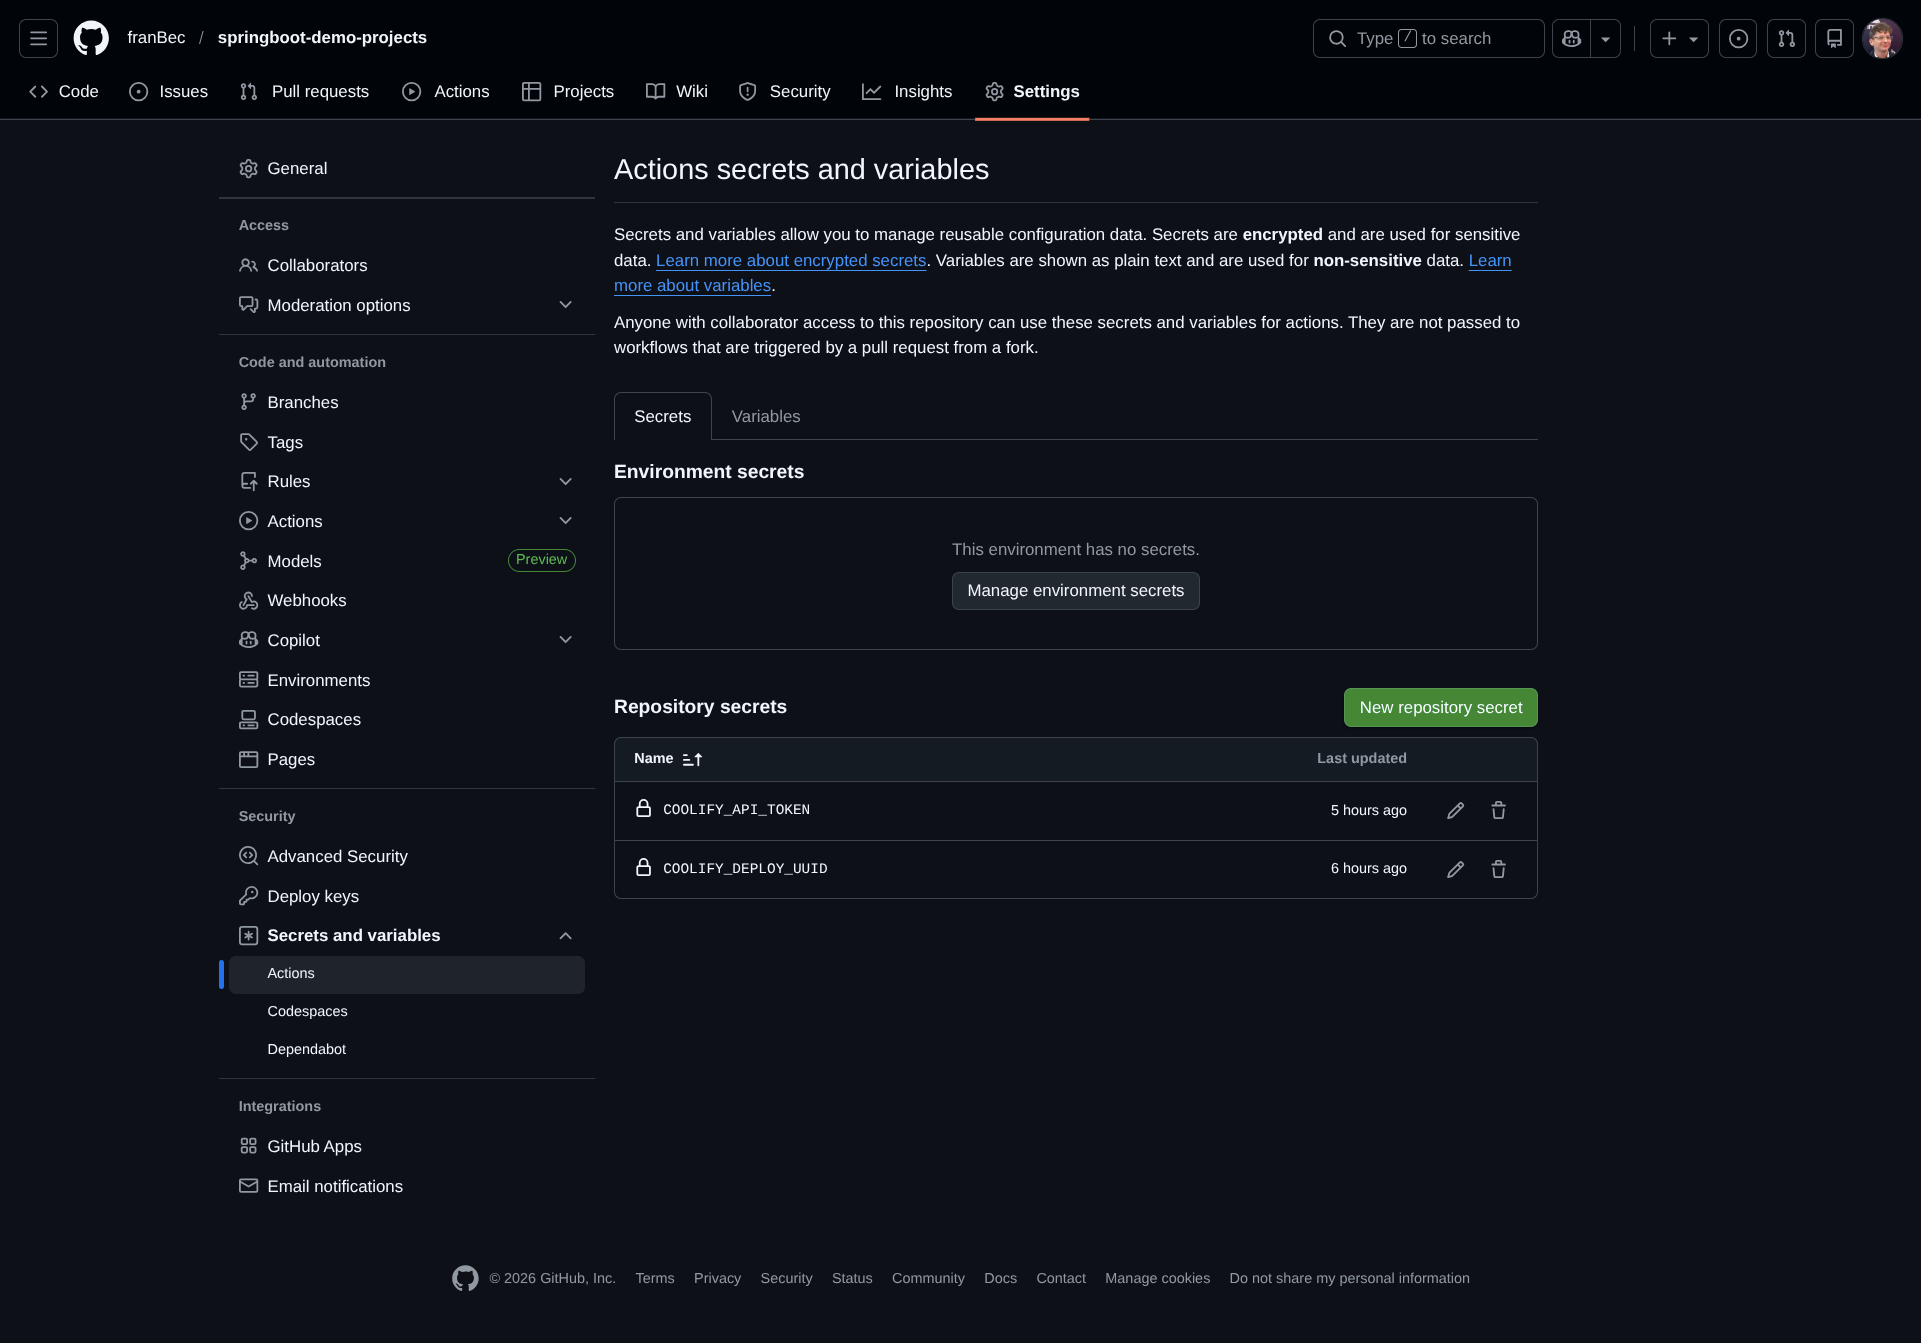
Verification
Push your changes to the main branch and watch the magic happen:
-
Check the GitHub Actions run to confirm the CI pipeline works:
- Your workflow should trigger and show both
build-and-testanddeployjobs - Look for the green checkmark indicating success
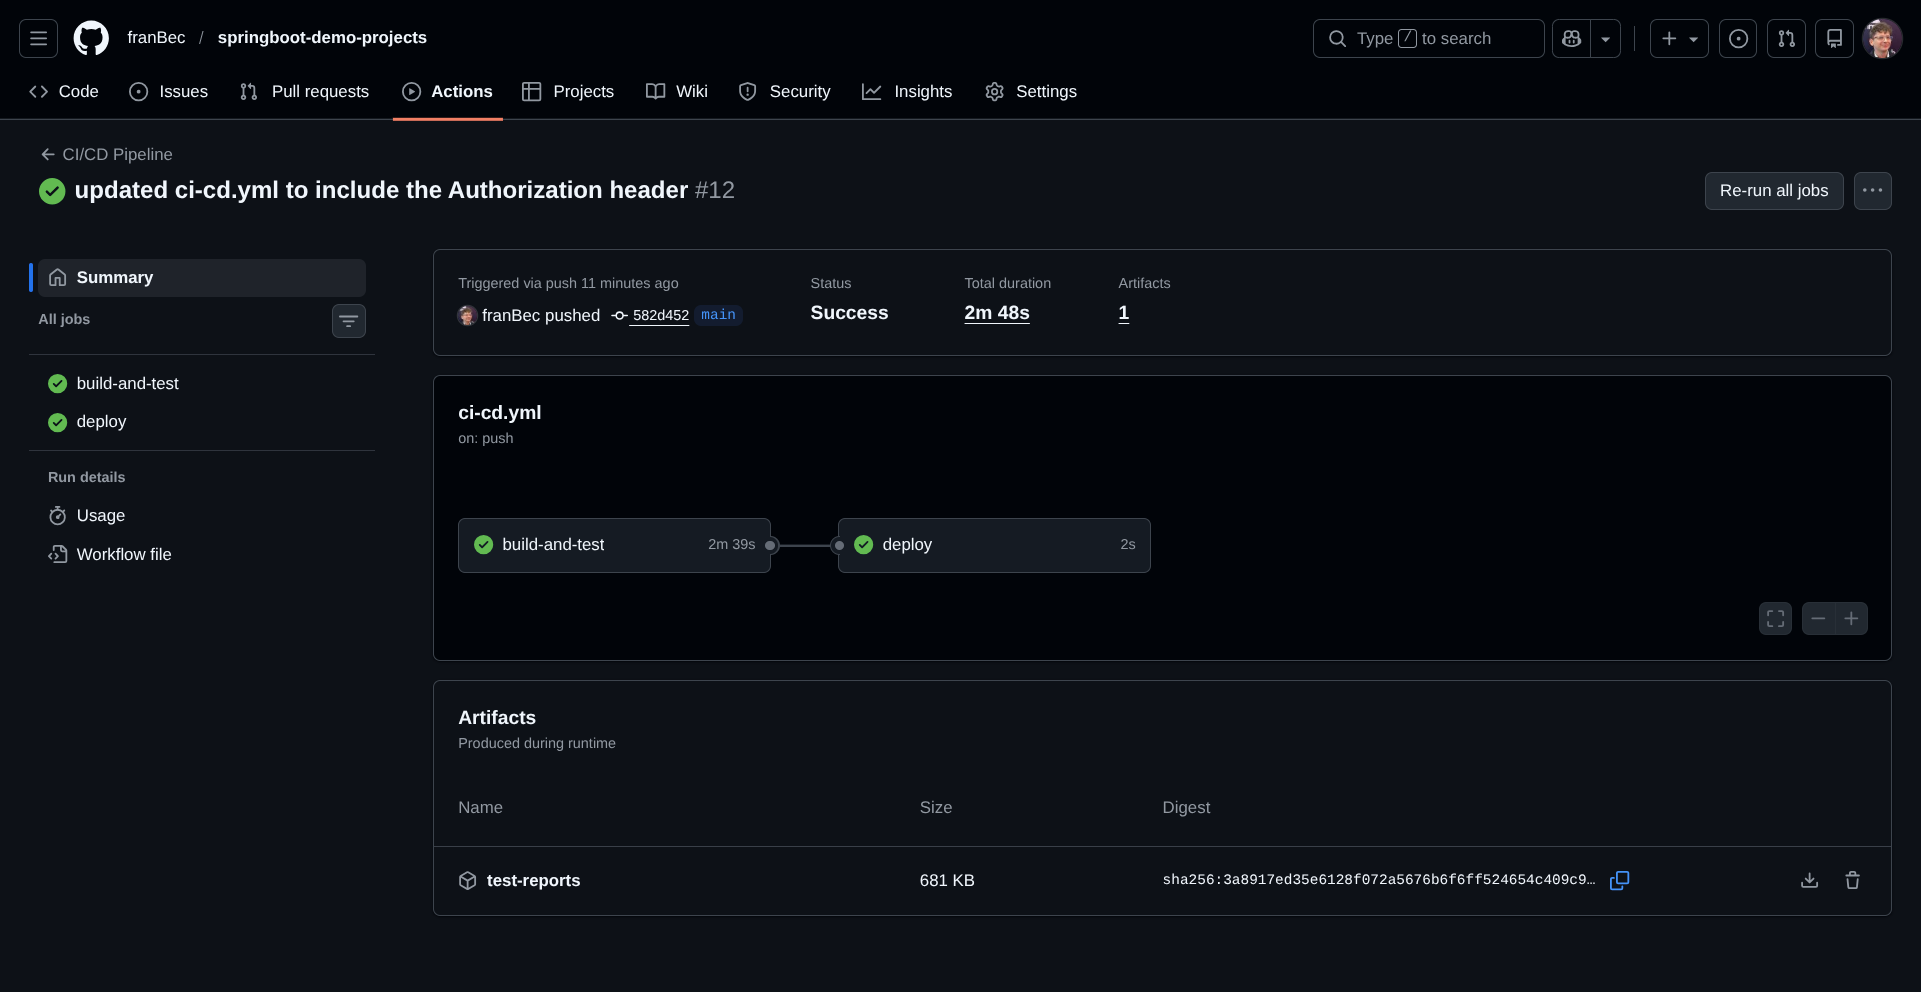
- Your workflow should trigger and show both
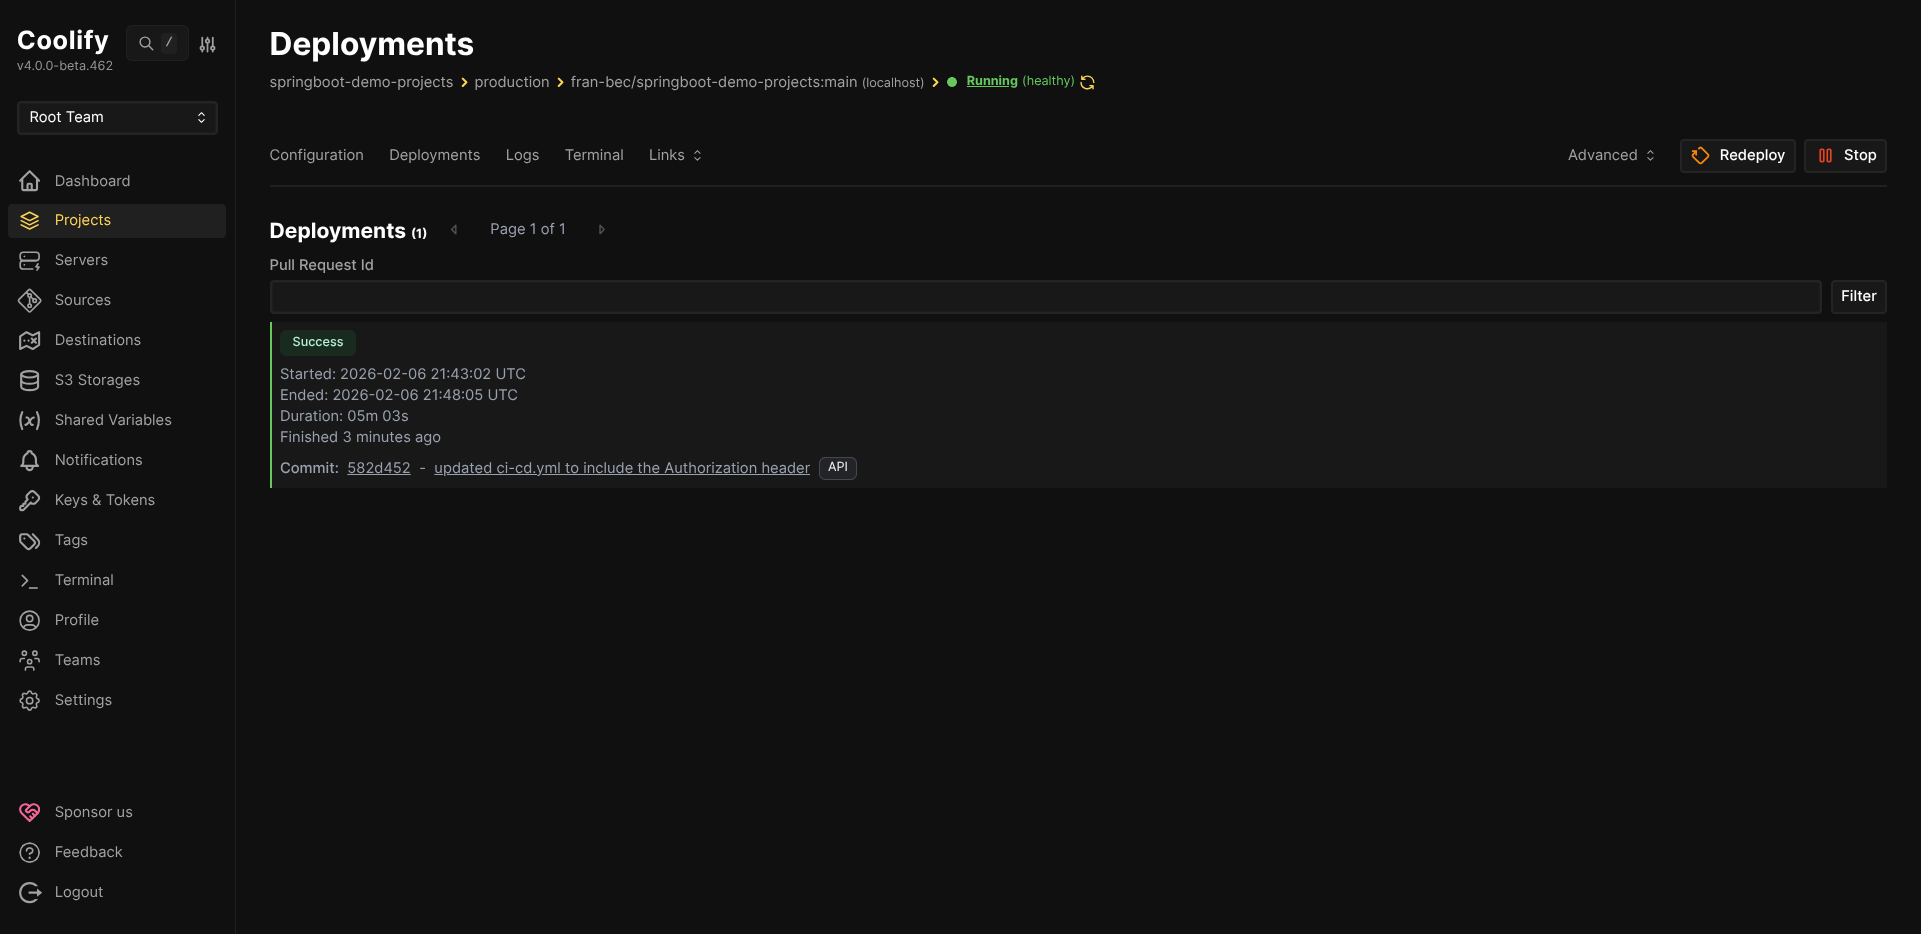
-
After a successful deployment (usually 3-5 minutes), you'll see it in the Deployments tab:
-
Finally, test your deployed API:
Congratulations! You've successfully set up a production-ready CI/CD pipeline for your Spring Boot monorepo. Now every push to main will automatically run tests before deploying, giving you confidence that production is always in a working state.