Database setup
The previous sections covered how Spring talks to databases and how to generate JPA entities. Now it's time to wire up a real database. We're replacing the embedded H2 with PostgreSQL 17 and using Flyway to manage schema migrations.
The plan
Here's what we're setting up:
- PostgreSQL as the production database
- Flyway to run versioned SQL migrations on startup
- pgAdmin as a web UI for database inspection
- A restricted application user (
sakila_app) that only has DML privileges, not DDL
The two users are the important security decision here. The admin user (sakila) owns the schema and runs migrations. The application connects as sakila_app, which can only SELECT, INSERT, UPDATE, and DELETE. If your app connection is compromised, an attacker can't DROP tables or ALTER schema. Small thing, big difference in a breach.
Files overview
- Java
- Kotlin
- Groovy
Flyway migrations
Flyway runs versioned SQL files in order. Each file runs exactly once, and Flyway tracks what's already been applied in a flyway_schema_history table.
We have three migrations:
-
V1: Create the Sakila Schema. This creates all the tables, primary keys, foreign keys, and indices for the Sakila sample database.
-
V2: Insert Sample Data. V2 inserts 47,000+ lines of sample data. It's a large file converted from H2 format to PostgreSQL-compatible SQL.
-
V3: Grant App User Privileges. This runs after V1 and V2, so all tables exist by the time it grants privileges.
The separation matters. V3 runs as the admin user but only grants DML rights to sakila_app. The ALTER DEFAULT PRIVILEGES lines make sure any tables created by future migrations are also accessible to the app user automatically.
Docker setup
It's uncommon to find the database in the same Docker Compose file as the application services. Databases are usually managed separately, whether because of technical debt making them hard to containerize, or separation of concerns (imagine accidentally wiping out the volume where your production data lives). Here, everything lives together for simplicity's sake.
PostgreSQL image
We are extending the postgres:17-alpine image to run an init script that creates the sakila_app user during first startup.
FROM postgres:17-alpine
COPY init-users.sh /docker-entrypoint-initdb.d/01-init-users.sh
RUN chmod +x /docker-entrypoint-initdb.d/01-init-users.sh
The init script runs via Docker's /docker-entrypoint-initdb.d/ mechanism, which executes any scripts in that directory when the database is first initialized. It creates sakila_app with a password from an environment variable and grants connection rights. Actual table-level privileges come later via Flyway migration V3.
Flyway image
Flyway runs as a one-shot container: it connects, applies pending migrations, then exits.
FROM flyway/flyway:12-alpine
COPY database/flyway/migrations/ /flyway/sql/
We bake the SQL files into the image at build time. No bind mounts, no volume gymnastics. The context: . in docker-compose.yml is needed because the Dockerfile copies from database/flyway/migrations/ relative to the repo root.
A standalone container makes the migration a prerequisite step that completes
before the app starts, using the admin credentials. The app never needs to
know the admin password. (You could run Flyway from the Spring Boot app itself
using the spring-flyway
autoconfiguration,
but separating concerns keeps things cleaner.)
docker-compose.yml
Here's what's happening in this compose file:
postgreshas a healthcheck. Flyway'sdepends_onwaits forservice_healthy, meaning it won't try to connect until PostgreSQL is actually ready to accept connections.flywayhasrestart: "no". It's a one-shot job. Once it finishes, it stays finished.- Spring Boot services depend on
flywaywithcondition: service_completed_successfully. They don't start until migrations are done. postgres-dataandpgadmin-datavolumes persist data across restarts.
Spring Boot configuration
Add the PostgreSQL driver
Add runtimeOnly 'org.postgresql:postgresql' to each module's build file. That's the JDBC driver Spring Boot needs to connect to PostgreSQL.
- Java
- Kotlin
- Groovy
runtimeOnly 'org.postgresql:postgresql'
runtimeOnly("org.postgresql:postgresql")
runtimeOnly 'org.postgresql:postgresql'
application.yaml
The datasource and JPA settings point to PostgreSQL. The credentials come from environment variables, which Docker Compose injects at runtime.
- Java
- Kotlin
- Groovy
  datasource:
    url: ${SPRING_DATASOURCE_URL}
    driver-class-name: org.postgresql.Driver
    username: ${SPRING_DATASOURCE_USERNAME}
    password: ${SPRING_DATASOURCE_PASSWORD}
  jpa:
    database-platform: org.hibernate.dialect.PostgreSQLDialect
    hibernate:
      ddl-auto: none
    show-sql: false
  flyway:
    enabled: false
  datasource:
    url: ${SPRING_DATASOURCE_URL}
    driver-class-name: org.postgresql.Driver
    username: ${SPRING_DATASOURCE_USERNAME}
    password: ${SPRING_DATASOURCE_PASSWORD}
  jpa:
    database-platform: org.hibernate.dialect.PostgreSQLDialect
    hibernate:
      ddl-auto: none
    open-in-view: false
    show-sql: false
  flyway:
    enabled: false
  datasource:
    url: ${SPRING_DATASOURCE_URL}
    driver-class-name: org.postgresql.Driver
    username: ${SPRING_DATASOURCE_USERNAME}
    password: ${SPRING_DATASOURCE_PASSWORD}
  jpa:
    database-platform: org.hibernate.dialect.PostgreSQLDialect
    hibernate:
      ddl-auto: none
    show-sql: false
  flyway:
    enabled: false
flyway.enabled: falsetells Spring Boot not to run Flyway itself. Our standalone Flyway container handles that. Setting it to true here would mean the app tries to run migrations on every startup usingsakila_appcredentials, which don't have DDL privileges. It would fail.ddl-auto: nonemeans Hibernate doesn't touch the schema at all. Flyway owns that.
Deploying the stack in Coolify
The docker-compose.yml is ready to deploy wherever Docker is running. We'll use the same Coolify instance set up in the deployment on a VPS guide.
Set up environment variables
Before deploying, add the new variables to your Coolify application's environment configuration. These only need to be available at runtime. No other checks are needed.
| Variable | Description |
|---|---|
POSTGRES_DB | Database name (e.g., sakila) |
POSTGRES_USER | Admin user (e.g., sakila) |
POSTGRES_PASSWORD | Admin user password |
SAKILA_APP_PASSWORD | Password for the restricted sakila_app user |
PGADMIN_DEFAULT_EMAIL | pgAdmin login email |
PGADMIN_DEFAULT_PASSWORD | pgAdmin login password |
Deploy and assign a domain to pgAdmin
Trigger a deployment. Once it's running, go to the Configuration tab in Coolify and assign a domain to the pgadmin service: https://sakila-pgadmin.your-domain.whatever:80. Coolify's reverse proxy will route traffic to the pgAdmin container on port 80.
Connecting pgAdmin to PostgreSQL
Once pgAdmin is running, open it in your browser and log in with the PGADMIN_DEFAULT_EMAIL and PGADMIN_DEFAULT_PASSWORD you set. Then register the PostgreSQL server.
Right-click Servers → Register → Server... and fill in two tabs:
General tab:
| Field | Value |
|---|---|
| Name | Sakila Database (or whatever you want) |
Connection tab:
| Field | Value |
|---|---|
| Host name/address | postgres |
| Port | 5432 |
| Maintenance database | sakila |
| Username | sakila |
| Password | your POSTGRES_PASSWORD value |
| Save password? | on |
The hostname is postgres (the Docker service name) because pgAdmin and PostgreSQL share the same Docker network. Docker's internal DNS resolves the service name to the correct container, so no IP address is needed.
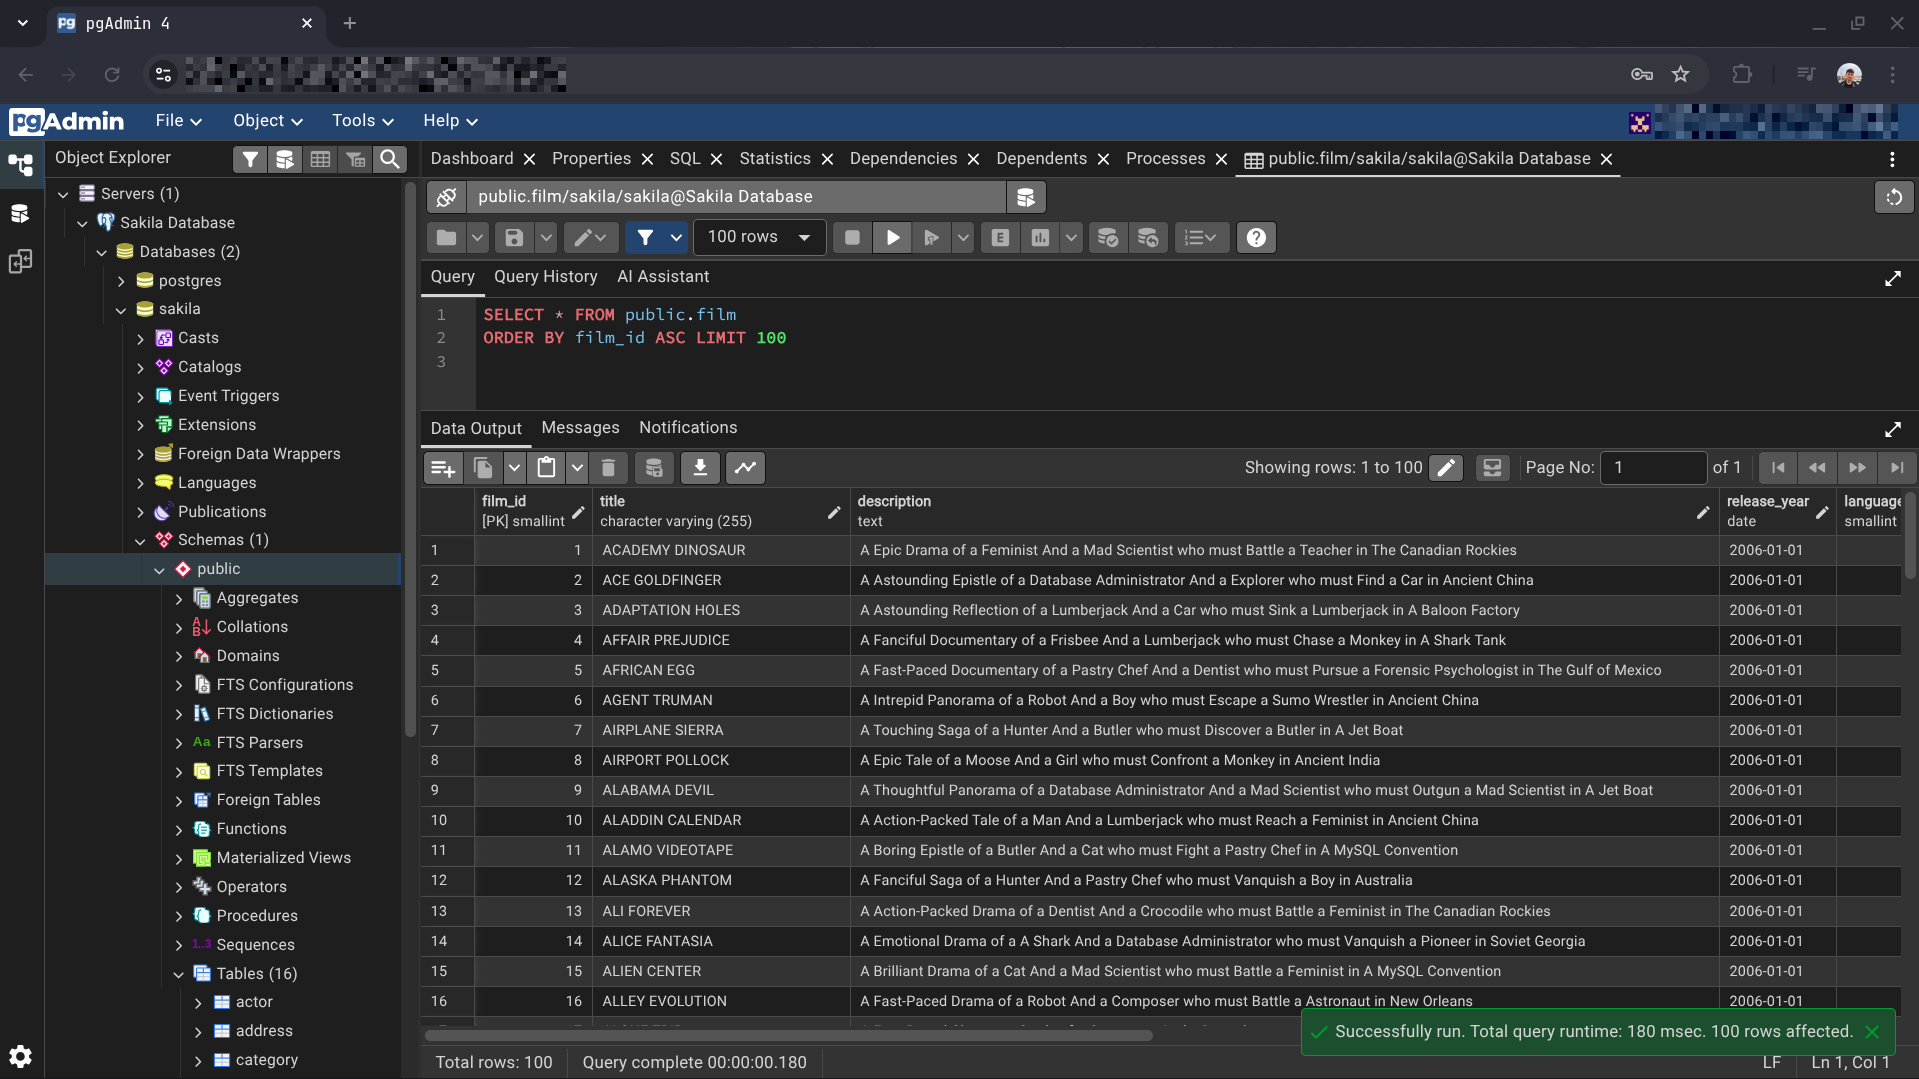
Once connected, you'll have full access to browse the schema, run queries, and inspect the Sakila data: