Run the application
-
Open IntelliJ IDEA → File → Open → Select the unzipped project folder.
-
First-time JDK setup (if prompted):
- IntelliJ will ask you to download a JDK. Choose the same version you selected in Spring Initializr (e.g., Java 21).
- Click Download JDK and follow the prompts.
-
Wait for background tasks:
- Look for progress indicators in the lower-right corner (e.g., "Downloading Gradle dependencies" or "Indexing").
- Let these finish, they set up your project's tools and libraries.
-
Run the application:
- Search for the Gradle tool window (in IntelliJ it's usually a small elephant icon on the right side).
- Run the
buildcommand. - Run the
bootRuncommand.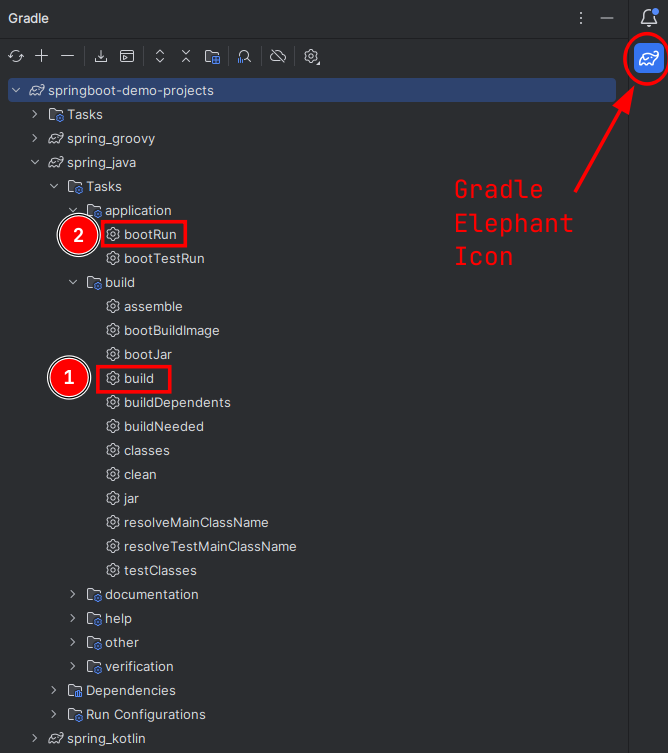
-
Check the run terminal: After a few seconds, you'll see something similar to
Tomcat started on port 8080 (http) with context path '/'. This means your Spring Boot app is live! -
Test it out: Go to http://localhost:8080. You'll see a Whitelabel Error Page. This is normal because we haven't done any development yet.
Terminal$ w3m -dump http://localhost:8080Whitelabel Error PageThis application has no explicit mapping for /error, so you are seeing this asa fallback.
Congratulations! Your Spring Boot app is up and running.
Spring Boot changed this:
Before Spring Boot, getting a Java app to listen on a port like 8080 required hours of manual setup:
- Configuring
XMLfiles (likeweb.xml). - Deploying
WARfiles to an external server (e.g., Tomcat). - Writing boilerplate code just to start the server.
Today with Spring Boot:
- The embedded Tomcat server starts automatically.
- Zero code needed: the
main()method does everything. - No
XMLor manual server setup.
Spring Boot turned what used to be a days-long chore into a 10-second task. And we haven't even written a single line of our own code yet!